AC-507 Mk I Reaver
From Star Trek: Theurgy Wiki
| |
| Name: | Mk I Reaver |
| Class: | AC-507 |
| Starship Type: | Warp Fighter |
| Production Status: | Unknown |
| Purpose: |
|
| Constructed: | Antares Shipyards |
| Commissioned: | Unknown (Temporal Anomaly) |
| Dimensions: |
|
| Mass (w. Standard Armament): | 26 050 000 kg |
| Technical Specifications | Advantages
|
| Standard Crew Complement: |
|
| Warp & Impulse Speeds: |
Unknown |
| Tactical Specs: |
|
| Defensive Specs: |
|
| Engine Specs: |
|
| Other Systems |
|
| Sensors |
|
| Other Standard-issue Equipment (stored in cockpit) |
|
| |
UNDER CONSTRUCTION
The Mk I Reavers were the kind of warp fighters that were commissioned to the USS Calamity. They were first seen outside the Hromi Cluster, where the Calamity attacked the Theurgy and Harbinger the first time. Once Sarresh Morali provided the shield harmonics for the Calamity and the Reavers both, it was discovered that there were no life-signs found, and that the warp fighters and starship alike were piloted by holographic pilots and crew.
The original design of the Reavers were not to include holographic Tactical CONN officers, however, since Evelyn Rawley discovered that she could commandeer and fly one of them after it was shot down by Thomas Ravon on Theta Eridani IV. The shot had destroyed the rigged holo-emitter that held the pilot's holographic matrix, and only the helmet remained inside the cockpit. With the use of TVD - Through Visor Display - Rawley see through the armoured and fortfied cockpit, and even fly the Reaver into battle. She landed it on the Theurgy before the starship ascended from Theta Eridani IV, all the other Reavers destroyed, giving Sten Covington and Narik Cinsaj a project in trying to retro-engineer the fighter before the Theurgy would encounter the Calamity again.
Narik Cinsaj, however, was raped and murdered by Riptor before she could even begin the undertaking, with only some light repairs able to be done on it before Declan Vasser's mutiny on the Theurgy. The Calamity attacked, and despite Captain Jien Ives'a orders, Thea launched the Reaver into battle with the Calamity, meaning to restore Cala's subroutines. Thea failed, and the Reaver was critically damaged before the Calamity was destroyed. Miles Renard towed the damaged Reaver back to the Theurgy in the aftermath of the battle, allowing Sten Covington to resume working on it.
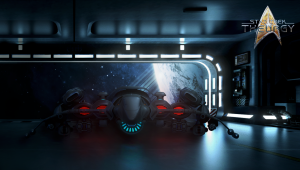
As of the mission to Starbase 84, and with the help from Eun Sae Ji, Covington was able to use salvaged parts from other Reavers in order to restore the one sitting in the Theurgy's Fighter Assault Bay. While not completely repaired, it was flight-worthy, but no one had any training in operating the craft, so it was deemed a liability to use in the upcoming mission to Starbase 84.
Fighter Demonstration
Production History
Little is known about the origin of this warp fighter, which is not like anything that Starfleet and the Advanced Starship Design Bureau has made before. Based on findings in the last remaining fighter on the USS Theurgy, it was constructed at the Antares Shipyards, and the best guess was that the incentive of the design and deployment came from the usurpers that overtook the power in Starfleet Command.
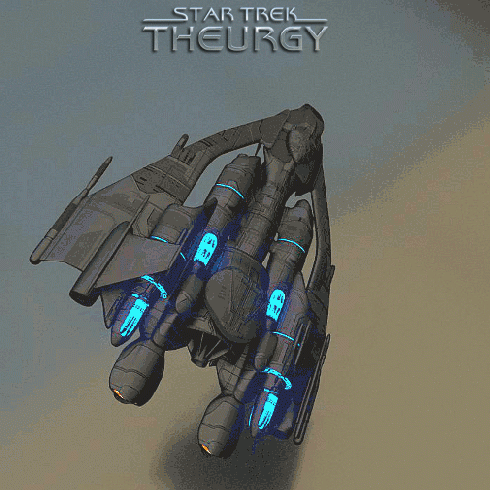
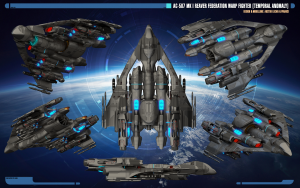
As for the design, it's vastly different from that of a Valkyrie-line fighter. Instead of the nose-mounted, small navigational deflectors of the earlier fighters, the Reaver had its deflector moved down the the dorsal side of the fuselage, where it was often found on normal-sized starships. The fuselage itself was an open design, allowing for a great reduction on hull mass, which granted ability to integrate a quad-nacelle assembly into the fighter's fuselage. The entire fighter is a skeleton hull binding together an unprecedented amount of engine power, and not just in manner of the four nacelles, but also the gargantuan impulse drive monstrosity of an engine in the centre aft of the fighter's body. The impulse engine is also complemented with new combustion thrusters on both of the wings, which for a talented pilot offers a lot in the way of combat manoeuvrability.
Despite its almost frail appearance surrounding the propulsion systems, the entire warp fighter is a well armoured construction that is meant to preserve the pilot as well as its sensitive computer systems. Down on Theta Eridani IV, it didn't keep the hull from being penetrated by the atmospheric yield of an AA-grade isomagnetic disintegrator on its highest setting, but in zero-gravity, and if the shield harmonics aren't compromised, the hull could take a lot of punishment before yielding. With the use of TVD - Through Visor Display - the pilot could also see through the armoured cockpit, granting no structural weakness above the cockpit area.
It also appeared as if the advanced technology that the Voyager brought home from the Delta Quadrant in the end of 2378 had made its way to Starfleet's production-lines, since not only did the Reavers have transphasic torpedoes, but also compression phaser cannons and shields with the same phasing technology. While the USS Calamity did not possess that kind of shielding, the theory goes that transphasic shielding emitters could not be produced in starship-scale just yet, and that the Reavers - being smaller crafts - were fitted with the technology as a first phase. Had it not been for Sarresh Morali's revelation of the Calamity's and the Reavers' shield harmonics in the first battle outside the Hromi Cluster, or Thea's ability to reveal the updated harmonics in the final battle, the crews of the Theurgy and the Harbinger would never have survived the encounters they had with the nightmarish starship from the future and her holo-piloted warp fighters.
External Hard-point Options
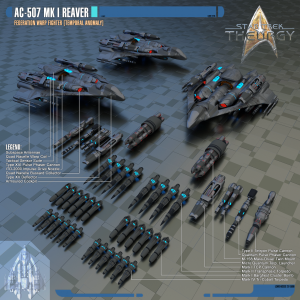
The fuselage design of the Mk I Reaver and its lesser mass allowed for a large number external wing-mounted hard points during missions, all listed below.
Micro Quantum Torpedo Launchers
Torpedo launchers that are mounted in pairs on the dorsal armament rigs on the Reavers. They hold 28 micro quantum torpedoes per launcher. This means that the hard-point option of additional torpedo launchers hold 56 mirco-torpedoes since the Reaver itself doesn't carry any as standard internal armament. Instead of internally stored quantum micro torpedoes, the Reaver's light and open fuselage design took precedence since it would grant many other optional armament solutions.
Two of these launchers were available on the Theurgy after the final battle with the Calamity.
Mk IV Tri-Cobalt Warhead
A tri-cobalt warhead was a type of explosive device utilized as a missile - meaning that it was a self-powered guided weapon. Tri-cobalt devices were not standard issue weapons on Starfleet starships, but were sometimes carried in addition to photon torpedoes. A pair of tri-cobalt devices, with a combined yield of 20,000 teracochranes, were used by the USS Voyager in order to destroy the Caretaker's Array in 2371. The explosion destroyed the station, leaving only particulate dust, vapors, and metallic fragments. The yield of these warheads could cause subspace ruptures to form, which hampered the mass-production initiatives by Starfleet up until the usurpers took over power in Starfleet Command. It is unknown if these may cause tears in subspace, but they were deployed against the Theurgy during the battle with the Calamity. Starship-issue tri-cobalt warheads have a yield of 10,000 teracochranes, whereas these smaller versions have a yield of 3,000 teracochranes.
Nine of these fighter-sized tri-cobalt warheads were available on the Theurgy after the final battle with the Calamity.
Mk I Barghest Cluster Bomb
Similar to the nature of a tri-cobalt torpedo. Essentially, this is a torpedo filled with several micro tri-cobalt warheads. Once the torpedo comes in contact with an enemy or a surface, it detonates and fragments into smaller charges, which spread from the point of impact, also exploding on impact, resulting in a large pattern of detonations. Deployed right, this hard-point may cause severe damage when scattered upon enemy shield impact. The torpedo snap open by spring-force, and both the arming and the fuze is pilot-controlled by either manual or automatic settings. It can be armed prior to discharge or scattered by manual command.
Twenty-seven of these fighter-sized tri-cobalt warheads were available on the Theurgy after the final battle with the Calamity.
Mk II Transphasic Torpedo
These are phasing high yield shield penetration torpedoes, and a descendant from the torpedoes the Voyager used to make the Borg's transwarp network to collapse. A single torpedo of the size launched from a starship was capable of destroying a Borg cube. Transphasic torpedoes were in fact kept by Starfleet as the weapon of last resort to be deployed to starships only when all else had failed against the Borg. They were the one and only thing Starfleet knew the Borg had not yet adapted to and for that reason wanted to keep this ace in the hole for as long as possible. It was based on generating a destructive subspace compression pulse. Upon detonation the torpedo delivered the pulse in an asymmetric superposition of multiple phase states. Shields could only block one subcomponent of the pulse. The other subcomponents delivered the majority of the pulse to the target. Every torpedo had a different transphasic configuration, generated randomly by a dissonant feedback effect to prevent the Borg from predicting the configuration of the phase states.
Four of these fighter-sized torpedoes - still carrying a devastating yield despite its inferior size - were available on the Theurgy after the final battle with the Calamity.
M-158 Mass Driver Twin Mount Turret
Twin Dual Cannon guns utilising an ammunition replicator to create 30mm tungsten shells. These shells were suspended in a small warp field bubble to render them nearly weightless before being electromagnetically propelled at a speed near mach 15 with a rate of up to 1200 rounds per minute, assuming all four cannons are being fired. Devastating against soft targets as well as being effective against armours of nearly all types. However it was ineffective against shields, and its projectiles could be easily reflected via standard deflector arrays. The weapon could be placed in a fixed forward position or can be set to automatically track subsonic targets for fire, though it proved to be ineffective at automatically tracking fast moving small targets. It could hit large targets moving at high speeds but not with the same precision as expected with slow or fixed targets.Designed for aerial and suborbital assault on non-shielded terrestrial targets, deep space strikes against bases, and aerial support of ground operations (see also information about the Valkyrie-mounted turrets).
Two of these twin-mount turrets were available on the Theurgy after the final battle with the Calamity.
Quantum Pulse Phaser Cannon
X
X
X
X
Type II Tetryon Pulse Cannon
X
X
X
X
Mk I Transphasic Compression Phaser Cannon
X
X
X
X
X
Transphasic Shielding
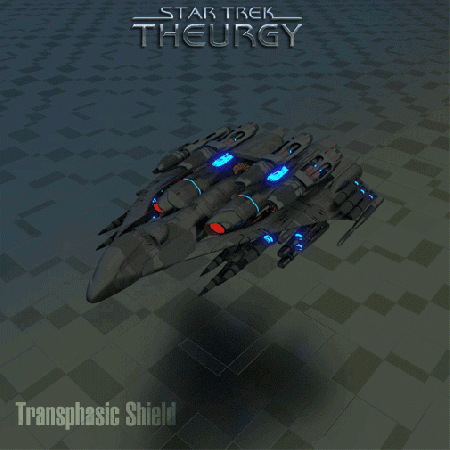
After Voyager returned from the Delta Quadrant, it was discovered that the technology of transphasic torpedoes could be applied in deflector shields to create transphasic shielding. Using these principles in shielding, however, first caused a power drain, cutting down warp and impulse speed efficiency quite severely. Moreover, it had the potential to quickly burn out shield emitters. Therefore, new emitter technology was required, and it was not until the Mk I Reaver that the solution presented itself.
Instead of projection-technology, with shield emitters casting the transphasic shielding around the craft, the Reaver instead had nanotech molecular plating installed, but acting as a permanent filament in the armoured hull. One might say that the ablative armour lacing in the hull acted as a conduit for the transphasic shielding. The result was a secure, non-volatile projection of the transphasic shield, so while still an energy drain on the craft, it wouldn't cause the shield emitters to burn out. Warp and impulse capacity was still diminished, and the passive emitter solution did not allow for a completely impenetrable shield either, but still three (x3) times better than regular, contemporary shield technology whilst activated.
A Reaver could maintain the transphasic shield, energising the nanotech molecular plating, for a maximum of ten seconds a time. Between each activation, it would need twice the amount of time activated to regain sufficient power levels. The total amount of shield-time amounted to one full minute per engagement - the Reaver then having to undergo maintenance in order to preserve the integrity of the nanotech plating. Activating the shield for more time than a total of one minute per engagement might ruin the effect of the shield permanently, if not ruining nanotech plating cohesion entirely.
